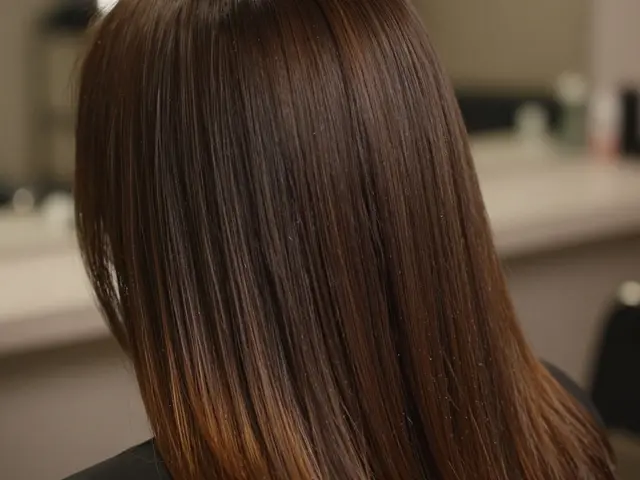
There is nothing quite like the feeling of running your fingers through soft, bouncy curls that look completely natural. But achieving that seamless blend where your curly hair meets a lace closure can be tricky. If you have ever struggled with a stiff, unnatural-looking hairline or curls that refuse to lay flat, you are not alone. The secret lies in understanding how to manipulate both your biological texture and the synthetic or human hair fibers without damaging either.
Styling curly hair with a closure isn't just about putting on a wig; it is an art form that requires specific techniques to ensure longevity and realism. Whether you are working with a pre-plucked unit or a raw edge, the goal remains the same: invisibility. You want people to admire your curls, not question where your real hair ends and the extension begins. This guide breaks down the exact steps to achieve that flawless finish, from preparation to final styling.
Choosing the Right Closure for Your Curl Pattern
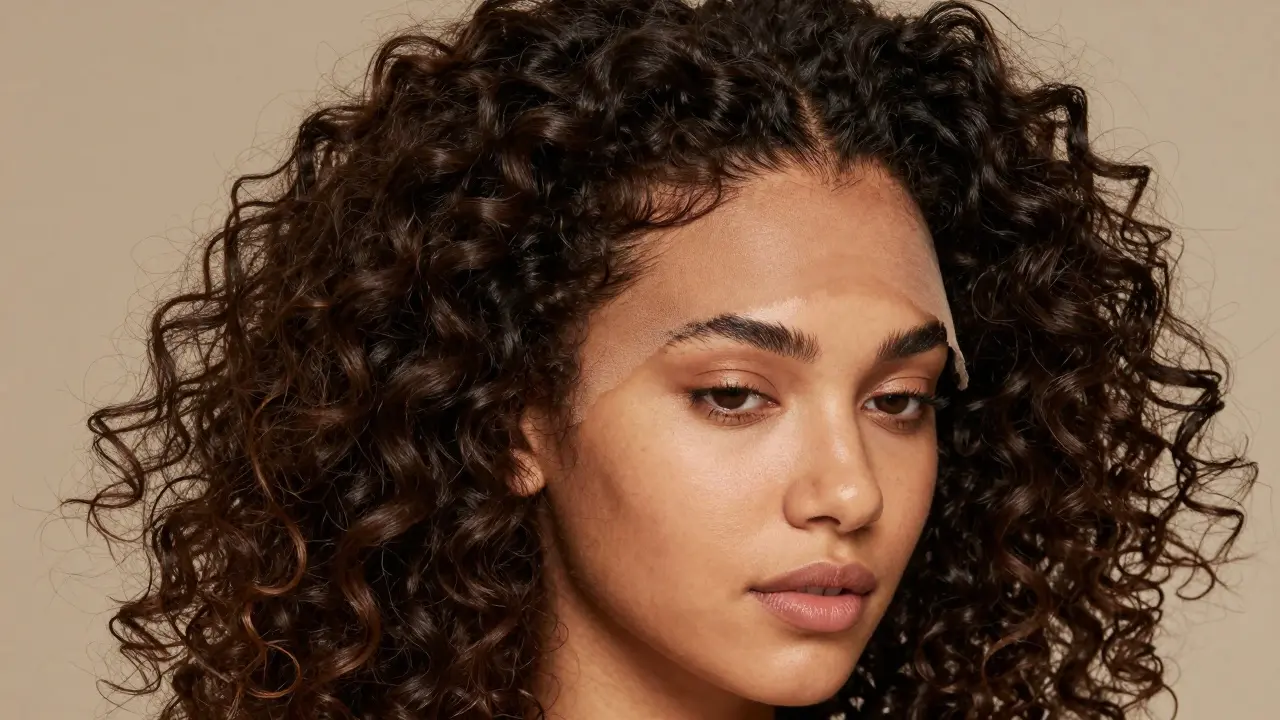
Before you even touch a styling tool, you need to ensure your closure matches your natural hair density and curl pattern. A common mistake beginners make is buying a closure that is too dense or has a curl pattern that does not match their bio hair. If your natural hair is a loose wave (Type 2) and you buy a tight coil (Type 4), no amount of styling will make them blend seamlessly.
| Natural Hair Type | Recommended Closure Texture | Key Feature to Look For |
|---|---|---|
| Type 2 (Wavy) | Body Wave / Loose Wave | Light density, natural movement |
| Type 3 (Curly) | Deep Curl / Curly | Medium density, defined ringlets |
| Type 4 (Coily/Kinky) | Kinky Curly / Afro Kinky | High density, tight coils |
Also, pay attention to the lace material. Swiss lace is thinner and more breathable but delicate, while French lace is slightly thicker and more durable. For curly hair, which often requires more manipulation, French lace might offer better longevity, but Swiss lace provides that undetectable melt if handled with care.
Prepping the Closure: Cutting, Bleaching, and Plucking
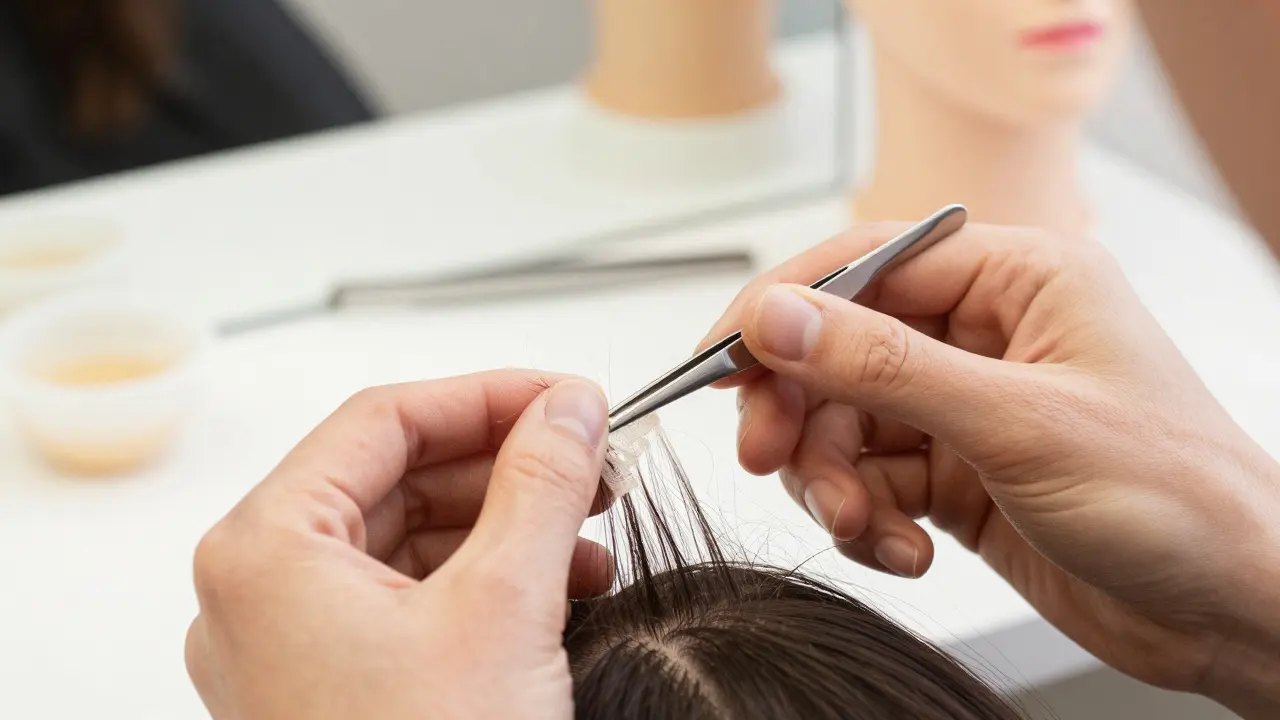
A straight out of the box closure rarely looks natural. It usually comes with a thick, bulky hairline and knots that are dark and visible against your scalp. To fix this, you need to customize the unit. Start by cutting the excess lace. Place the closure on a mannequin head or a durag to see where your natural hairline sits. Cut the lace in small increments, leaving about half an inch of extra lace around the perimeter. This gives you room to adjust the fit later.
Next, address the knots. If you have light skin and dark hair, the knots will show up like beads on a string. Use a knot bleaching kit to lighten these points. Apply the bleach carefully to the underside of the lace, avoiding the hair strands themselves. Let it sit for 10-15 minutes, then rinse thoroughly. This step is crucial for creating the illusion that the hair is growing directly from your scalp.
Finally, pluck the hairline. Use tweezers to remove individual hairs along the front edge. Create a zigzag pattern rather than a straight line, as natural hairlines are uneven. Focus on the center and forehead area, keeping the sides slightly denser to frame your face. This process takes time, but it transforms the unit from a generic product to a personalized piece.
Installation Techniques for a Secure Fit
Once your closure is prepped, it is time to install it. The foundation matters most here. Ensure your natural hair is flat and secure under a wig cap. Braiding your hair flat against your head prevents bumps and ensures comfort. Choose your adhesive wisely. For curly hair, you might prefer a gel-based adhesive over tape, as it allows for easier removal and less damage to the delicate lace.
Apply the adhesive in thin layers. Wait until each layer becomes tacky before applying the next. Press the closure onto the adhesive using a ball of cotton soaked in alcohol to help it melt into your skin. Start from the center and work outward. Hold it firmly for a few seconds to ensure it sticks. If you are using glueless closures, ensure the combs are sewn securely into your braids for stability.
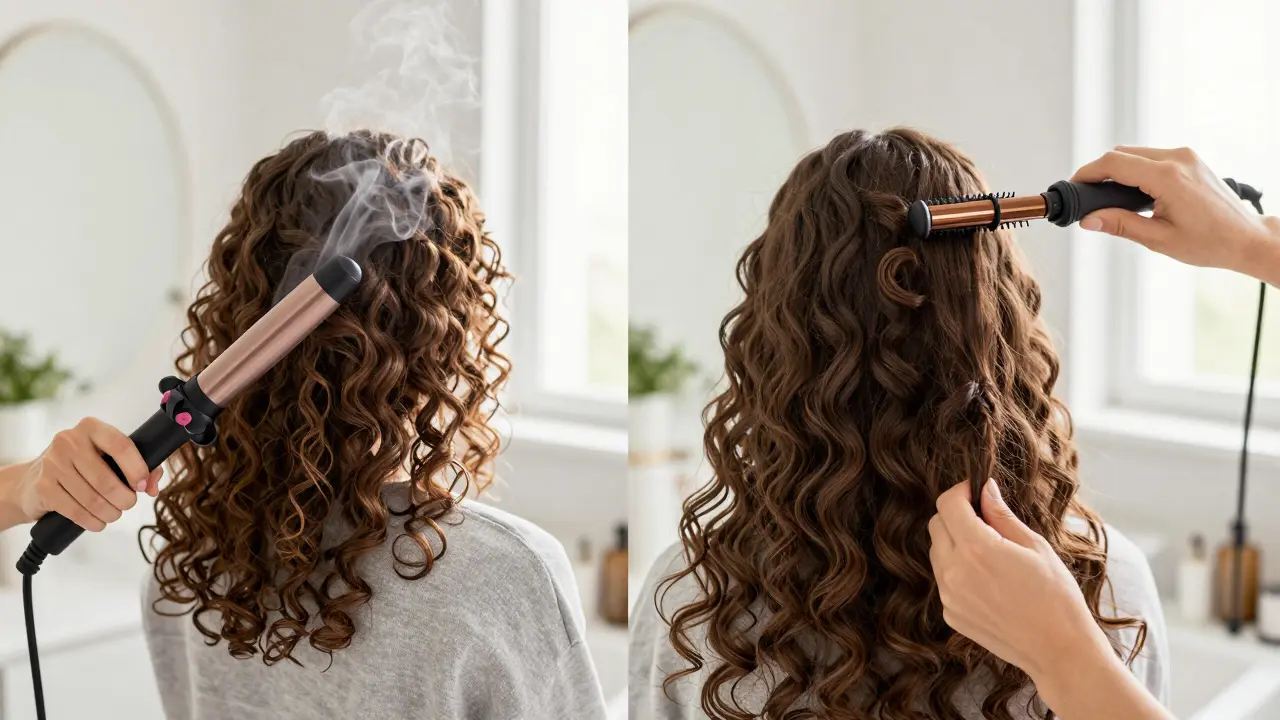
Styling Methods: Heat vs. Heatless Curls
Now comes the fun part: styling. You have two main options-using heat tools or going heatless. Both have pros and cons depending on the hair quality. If you have 100% human hair, you can use a curling iron or wand. Set the temperature to 350°F or lower to prevent dryness. Wrap sections of hair around the barrel, holding for 10 seconds before releasing. This gives you control over the curl size and direction.
If you prefer heatless methods, try the flexi rod method or twist-outs. Dampen the hair with water or a leave-in conditioner. Divide the hair into sections and wrap each section around a flexi rod or twist it tightly. Leave it overnight or until completely dry. When you remove the rods or untwist, you will get uniform, springy curls without any heat damage. This method is ideal for maintaining the integrity of the hair over time.
Maintenance and Longevity Tips
To keep your curly closure looking fresh, maintenance is key. Wash the hair every 2-3 weeks with sulfate-free shampoo and conditioner. Avoid rubbing the hair vigorously; instead, gently squeeze the products through the strands. After washing, apply a lightweight oil or serum to define the curls and reduce frizz. Store the wig on a mannequin head when not in use to maintain its shape.
Be mindful of environmental factors. Humidity can cause frizz, so use anti-frizz serums or light hold gels to keep the curls intact. If you sleep, protect the hair by wrapping it in a silk scarf or using a silk pillowcase. This reduces friction and prevents tangling, ensuring your curls stay defined for longer.
Can I use a curling iron on my closure?
Yes, but only if the closure is made of 100% human hair. Synthetic closures cannot withstand high heat and will melt. Always check the label before applying heat. Use a heat protectant spray and keep the temperature below 350°F to prevent damage.
How do I make my closure look natural at the hairline?
Pluck the hairline to create an irregular pattern, bleach the knots to match your scalp color, and use a gel or edge control to lay the baby hairs naturally. Customizing the density and shape of the hairline is essential for a realistic look.
What is the best way to store a curly wig?
Store your curly wig on a mannequin head to maintain its shape and prevent tangling. Keep it in a cool, dry place away from direct sunlight. If traveling, use a breathable mesh bag to protect it from dust and pressure.
How often should I wash my closure?
Wash your closure every 2-3 weeks, or more frequently if you use heavy styling products. Use sulfate-free shampoo and conditioner to keep the hair soft and hydrated. Avoid washing daily to prevent unnecessary wear and tear.
Can I cut the lace off my closure myself?
Yes, you can cut the lace yourself. Place the closure on a mannequin head to determine your hairline position. Cut slowly in small increments, leaving extra lace for adjustments. Be careful not to cut too close to the hair roots to avoid damaging the unit.