Getting an even hair color at home isn’t magic-it’s science and technique. Most people end up with patchy, streaky, or overly bright roots because they skip the basics. You don’t need a salon to get professional results. You just need to understand how hair absorbs color and how to work with your scalp’s natural heat, not against it.
Start with Clean, Not Freshly Washed Hair
Washing your hair the night before coloring is ideal. Hair that’s been washed 1 to 2 days ago has just enough natural oil to protect your scalp from irritation without blocking the dye. Freshly washed hair? Too clean. The oils that normally coat your strands have been stripped, and your hair becomes too porous, which leads to uneven absorption. Skip the conditioner right before dyeing-it acts like a barrier. Color needs to penetrate, not slide off.
Always Start with Dry Hair
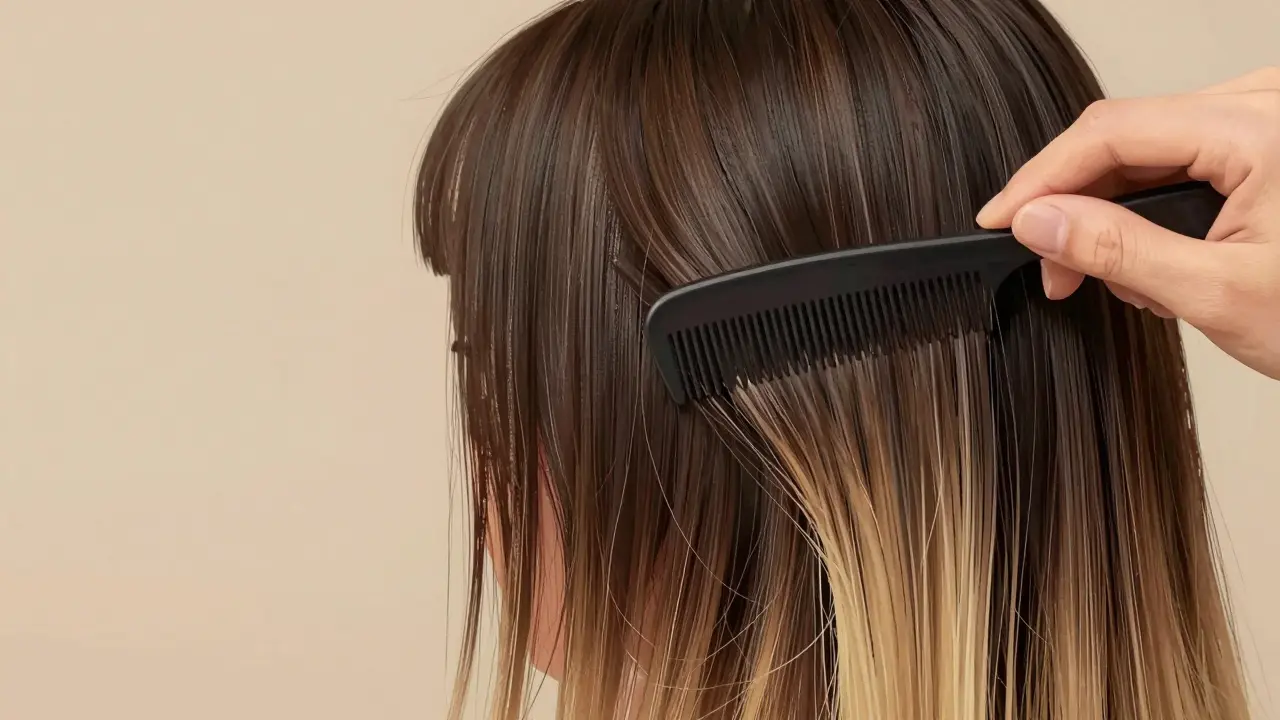
Never apply hair dye to wet or damp hair. Water dilutes the formula, and you’ll end up with streaks because the color doesn’t distribute evenly. Wet hair also changes how the dye reacts chemically, leading to unpredictable results. Make sure your hair is completely dry, brushed out, and tangle-free before you open the box. A wide-tooth comb works best here-no need for a brush, which can create static and break strands.
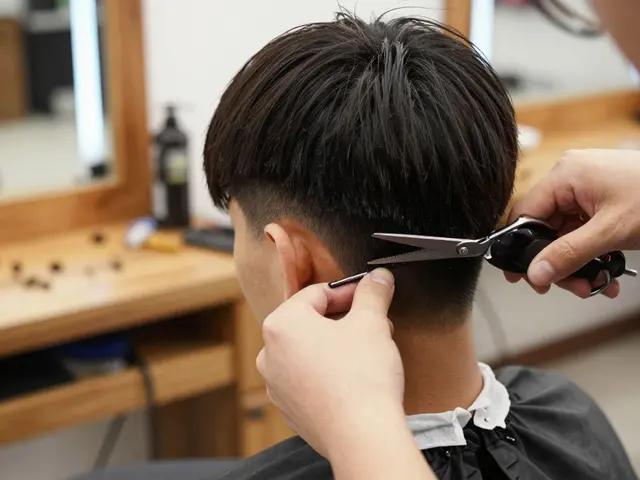
Section Like a Pro
One of the biggest mistakes people make is trying to color their whole head at once. That’s how you miss spots. Divide your hair into four equal sections: two in the front, two in the back. Use a tail comb to make clean, sharp partings. Clip each section up with a clip so you can work on one at a time. This method isn’t just for salons-it’s the reason professionals get even results every time.
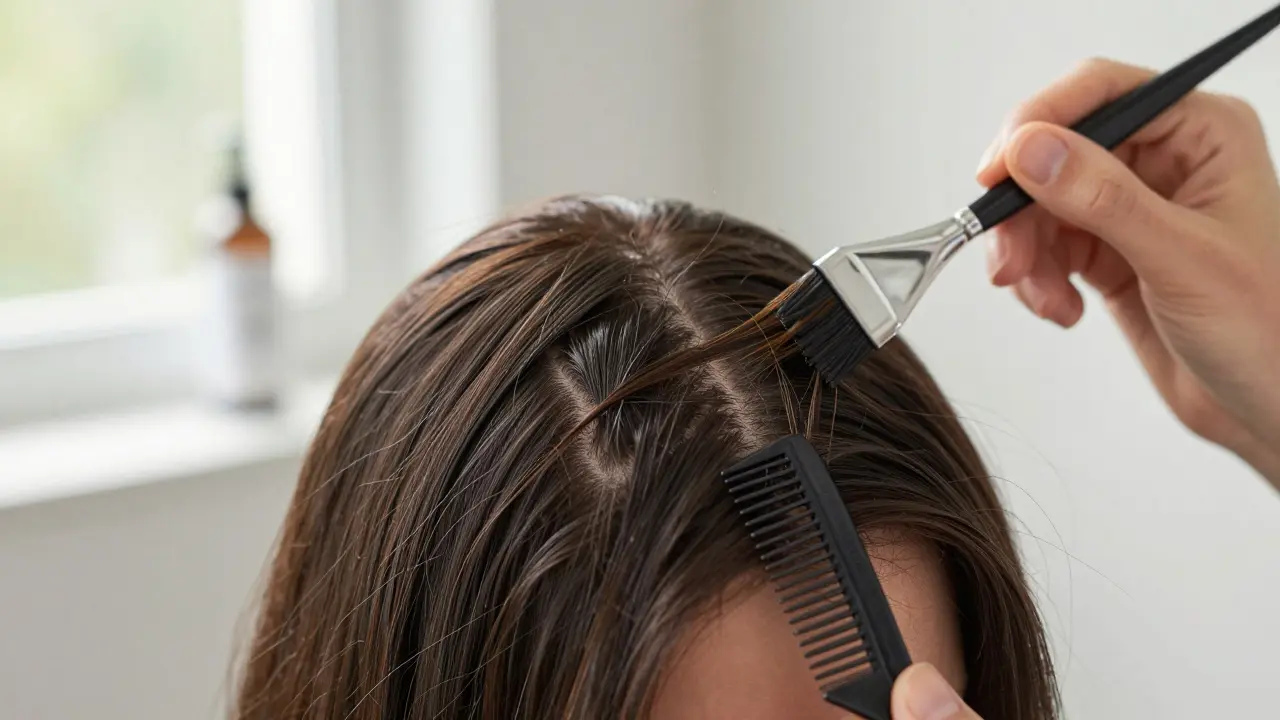
Use the Right Tools
That bottle with the nozzle? Fine for mixing, but not for application. Use a tint brush-it gives you control. Apply color directly to the scalp line with the brush, then use a wide-tooth comb to pull the color through the rest of the strand. This ensures saturation from root to tip. If you’re coloring long hair, keep a handheld mirror handy. It’s the only way to see what you’re doing on the back of your head. Don’t guess. Check.
Apply in the Right Order
This is where most at-home color jobs go wrong. If your hair has never been colored before (virgin hair), start at the roots. That’s because your scalp heats up your hair, and the roots process faster. If you start with the ends, your roots will over-process and turn orange or brassy.
But if you’re touching up color you’ve done before, flip the script. Apply color to the mid-lengths and ends first. Let it sit for 15-20 minutes. Then, apply the dye to your roots and let it process for the last 10 minutes. Why? Your roots are already warm from your scalp. Giving them less time prevents them from becoming too light or too dark. This technique stops the dreaded “hot root” effect.
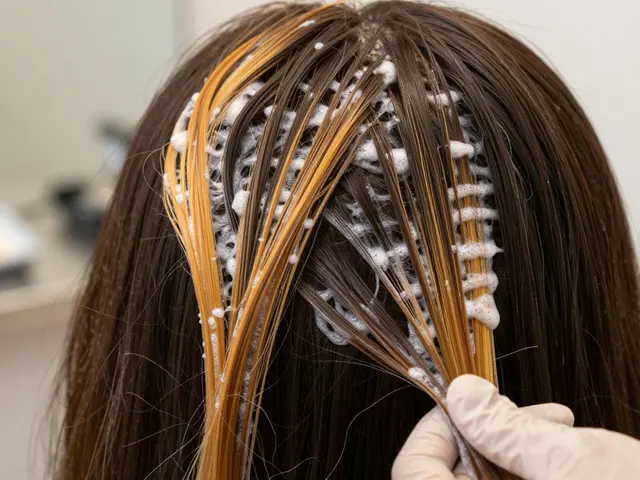
Saturate, Don’t Just Coat
Don’t just swipe color on top of your hair. You need to hit every strand from top to bottom. Work in small sections-about half an inch wide. Apply color to the underside of each section, then comb through. If the comb catches or feels resistant, that means you haven’t saturated enough. Add more color, then use your fingers to gently massage it in before combing again. The goal is for every strand to look wet with dye, not just the surface.
Blend the Transition
If you have grown-out roots or highlights, blending is key. Don’t just stop coloring where your natural hair begins. After applying the new color to your roots, use the same dye and gently pull it down 1-2 inches into your previously colored hair. Then, use the comb and your fingers alternately-comb to distribute, fingers to soften the line. This creates a seamless, natural-looking gradient. It’s called a “color melt,” and it’s the secret to looking like you just left the salon.
Choose the Right Developer
Box dyes come with a developer, usually 10 or 20 volume. Stick to 10 volume if you’re going darker than your natural color. It’s gentler and gives more predictable results. Use 20 volume only if you’re lightening. Going more than 1-2 shades lighter than your natural color at home almost always leads to brassy, uneven tones. If you’re unsure, stay close to your base. Subtle changes last longer and look more natural.
Timing Matters
Most dyes say 30-45 minutes. But that’s a range. Check your hair every 5-10 minutes after the first 20. Color develops faster on some strands than others. If your ends look darker than your roots, you’ve waited too long. Set a timer for the final 10 minutes only for your roots if you’re doing a touch-up. Over-processing = damage. Damage = more patchiness next time.

Aftercare Keeps Color Even
Color fades unevenly if you don’t care for it. Rinse with cool or lukewarm water-hot water opens the cuticle and lets color wash out. Use a sulfate-free, color-safe shampoo. Wash your hair every other day, not daily. Once a week, use a deep conditioning mask. It restores moisture and keeps the color looking fresh. If you swim, wear a swim cap. Chlorine bleaches dyed hair fast. Sun exposure? Use a UV-protectant spray. These aren’t optional. They’re what keeps your color even for weeks.
What If It’s Already Patchy?
If you’ve already colored your hair and it’s streaky, don’t panic. Don’t reapply the same color right away-that makes it worse. Wait at least a week. Then, try a color refresher. These are semi-permanent dyes that go on towel-dried hair, process for 10-30 minutes, and rinse out. They deposit pigment without lifting, so they help blend uneven areas. They’re perfect for reviving faded ends without touching the roots. And they’re mess-free.
Get Help if You Need It
Coloring your own hair is doable, but it’s hard to see the back of your head. If you’re nervous about missing spots, ask a friend. One person applies, the other checks. Two sets of eyes catch what one misses. It’s not embarrassing-it’s smart. Even pros have assistants.
Final Rule: Less Is More
Don’t try to fix a bad job with more color. Don’t rush. Don’t skip sections. Don’t ignore the roots. Even color comes from patience, preparation, and precision-not from buying the most expensive box dye. Stick to the steps. Use the tools. Respect the process. Your hair will thank you.
Can I dye my hair wet?
No. Wet hair dilutes the dye and prevents even absorption. Always apply hair color to completely dry hair for the most consistent results.
Why do my roots look too bright after dyeing?
Scalp heat speeds up the coloring process. If you apply dye to your roots first, they process longer than needed. To fix this, apply color to the mid-lengths and ends first, then do the roots last for only 10-15 minutes.
Should I use a tint brush or my fingers?
Use a tint brush for precision on roots and hard-to-reach areas. Use your fingers to blend color into the mid-lengths and ends, then follow up with a wide-tooth comb to distribute evenly. Combining both tools gives the best control.
How often should I recolor my hair at home?
Wait 4 to 6 weeks between full color applications to avoid damage. Between full dyes, use a color refresher on towel-dried hair every 2-3 weeks to revive faded areas without re-dyeing your roots.
Can I use a regular comb instead of a wide-tooth comb?
No. Regular combs can tug and break wet, dyed hair. A wide-tooth comb gently distributes color without damage. It’s essential for blending and ensuring even saturation from root to tip.

Jitendra Singh
February 26, 2026 AT 02:58Madhuri Pujari
February 26, 2026 AT 19:11Sandeepan Gupta
February 28, 2026 AT 12:18Tarun nahata
March 2, 2026 AT 04:10Aryan Jain
March 2, 2026 AT 19:26Nalini Venugopal
March 2, 2026 AT 23:35Pramod Usdadiya
March 4, 2026 AT 18:47Aditya Singh Bisht
March 5, 2026 AT 09:32Agni Saucedo Medel
March 6, 2026 AT 16:02