You want instant length or volume, but you’re not sure if you need clips, tape, beads, or a stylist. Here’s the short truth: some hair extensions use clips, many don’t, and your best choice comes down to how long you want to wear them, your hair’s density, and how much work you’re willing to do. If you’re new, you can master clip-ins or a halo at home in under 20 minutes. If you want semi-permanent, go to a pro-your scalp will thank you.
TL;DR / Key takeaways
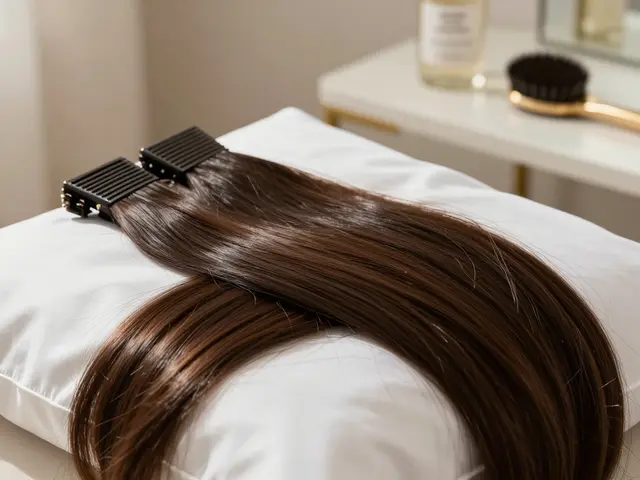
- Do extensions require clips? Only clip-ins do. Halo uses a wire. Tape-ins use adhesive. Sew-ins use thread. Micro-links use beads. Fusion uses keratin bonds.
- Fast and beginner-friendly: clip-in extensions or halo. Semi-permanent (6-12 weeks): tape-in, sew-in, or micro-link. Longest wear (3-4 months): fusion/keratin.
- Basic install flow: section → secure → blend → style. If it pulls, hurts, or feels tight, remove and retry. Pain is a red flag.
- Pick weight to match density: fine hair 120-160 g, medium 160-200 g, thick 200-240 g (for 18-22 inch clip-ins).
- Care rules: sulfate-free wash, detangle before bed, low heat near adhesives/bonds, never sleep in clip-ins. If you see redness or bumps, stop wearing and consult a dermatologist (American Academy of Dermatology guidance on traction alopecia).
Do they require clips? Types at a glance and how to choose
You’ve got six common categories. Only one needs clips to stay put. Use this quick filter:
- Want daily on/off with zero commitment? Choose clip-ins (clips) or a halo (no clips, a hidden wire).
- Want hair you can sleep in for 6-12 weeks? Choose tape-ins (adhesive), sew-ins (thread), or micro-links (beads).
- Want the longest wear with a salon finish? Choose fusion/keratin bonds (3-4 months) installed by a pro.
Here’s what the differences look like in 2025 for cost, time, and upkeep.
| Type | Clips Needed? | Install Time | Wear Time | Best For | Skill Level | Approx. Cost (US) | Damage Risk | Notes |
|---|---|---|---|---|---|---|---|---|
| Clip-in | Yes | 10-20 min at home | Daily wear; remove nightly | Beginners, events, flexible styling | Easy DIY | $60-$250 per set | Low | Fastest, no commitment; don’t sleep in them. |
| Halo (wire) | No | 5-10 min at home | Daily wear; remove nightly | Fast volume/length without clips | Easy DIY | $80-$350 | Low | Invisible wire sits like a headband under your hair. |
| Tape-in | No | 45-90 min (pro recommended) | 6-8 weeks; re-tape and move up | Fine-medium hair, seamless finish | Salon | $200-$800 install + $100-$300 maintenance | Medium | Avoid oil near tapes; wait 48h to wash. |
| Sew-in / Weave | No | 2-3 hours (salon) | 6-10 weeks | Thick/curly hair; long wear | Salon | $150-$600 | Medium | Tension must be right; too tight can cause breakage. |
| Micro-link / I-tip | No | 1.5-3 hours (salon) | 8-12 weeks; move up | Strand-by-strand, customizable | Salon | $300-$900 | Medium | Requires precise sectioning; avoid crushing beads. |
| Fusion / Keratin | No | 2-4 hours (salon) | 3-4 months | Most natural, long-term finish | Salon | $500-$1,500 | Medium-High | Heat or ultrasonic bonds; careful removal needed. |

How to use each type: steps, tools, and real-life examples
Before you start: match color in natural light, choose a length within ~4 inches of your current hair for the best blend, and decide if you want volume only (shorter sets) or length + volume (longer, heavier sets).
Clip-in extensions (the classic DIY)
What you need: clip-in set, tail comb, two sectioning clips, a teasing brush, and a mirror. Optional: light hairspray, heat tools.
- Prep and protect. Detangle, dry hair fully, and add heat protectant if you’ll curl or straighten.
- Create your base. Part a horizontal line about an inch above your nape. Clip the rest up.
- Add grip. Lightly tease the root line or mist with a light hairspray where clips will sit.
- Place the first weft. Start with a 3-4 clip weft. Snap the middle clip into the teased area first, then the sides. Keep clips 0.5-1 inch off the scalp-no pinching.
- Build upward. Move up in rows (nape → mid-ear → temples → crown). Use narrower wefts around the sides to avoid the hairline.
- Blend and style. Drop your natural hair over the top. Add a few loose waves through both your hair and the wefts to marry textures.
- Check the perimeter. Tilt and shake your head gently. If a clip feels loose, remove and re-clip slightly higher into denser hair.
Pro tips:
- Leave a 1-inch safety margin around your hairline and part, so clips stay hidden.
- Don’t stack too many wefts on fine hair; aim for 120-160 g total. Heavier sets can slip or show.
- Never sleep or swim in clip-ins. They’ll tangle and stress your roots.
Halo (wire) extensions
What you need: halo piece with adjustable wire, comb, and sectioning clips.
- Fit the wire. Adjust it to sit about 1-1.5 inches behind your hairline, snug but not tight.
- Anchor and cover. Place the halo like a headband. Use a comb to pull your top hair over the wire so it disappears.
- Blend. Add a soft bend with a curling iron to merge your ends with the halo.
- Check movement. Nod, turn, and flip. If it shifts, tighten the wire one notch.
Why choose it: fastest install, zero clips, gentle on the scalp. Great for weddings, photos, or daily wear when you want a break at night.
Tape-in extensions (semi-permanent, pro recommended)
What you need: tape-in wefts, clarifying shampoo, sectioning clips, tail comb, and a stylist’s hands. Removal needs a proper tape remover (alcohol or citrus-based) and patience.
- Prep clean. Wash with clarifying shampoo, no conditioner or oils near the roots.
- Paper-thin sections. Your stylist will take even, thin slices of hair. One tape goes under, one on top (“sandwich”).
- Pressure sets the bond. A flat tool presses the tapes together. No tugging; it should feel secure yet comfy.
- Wait before washing. Give adhesives 48 hours to cure. Sleep in a low braid to prevent tangles.
Removal and move-up: a proper remover breaks the adhesive’s grip. The wefts slide off, residue is cleaned, and tapes are replaced for another round. Don’t rip or peel-this is how breakage happens.
Sew-in (weave), Micro-link (beads), and Fusion (keratin)
These are salon services. Here’s the 10-second version so you can talk shop with your stylist:
- Sew-in: hair is braided in rows; wefts are sewn to the braids. Best when you’ve got sturdy, dense hair. Tension matters-too tight is a no.
- Micro-link/I-tip: tiny beads clamp individual strands to small sections of your hair. Adjustable and reusable hair, but needs precise maintenance.
- Fusion/Keratin: pre-tipped strands are bonded with heat or ultrasonic energy. Most seamless, most commitment. Removal needs a trained hand.
Safety note: any method that feels tight or gives you persistent tenderness isn’t “normal.” The American Academy of Dermatology warns that repeated tension from tight hairstyles and extensions can lead to traction alopecia. If you see bumps, redness, or shedding along your hairline, stop and see a board-certified dermatologist.
Real-life examples
- Wedding weekend: you want guaranteed blend that photographs well. Pick a halo or clip-ins you’ve test-driven a week before. Curl everything together.
- Gym 5x/week, low maintenance: tape-ins or micro-links. Wear a loose, mid-height pony; avoid oil on bonds/beads.
- Protective styling on thick curls: sew-in with a leave-out or a closure installed by a stylist who respects your hairline. Moisturize your scalp regularly.
- Thinning at the temples: avoid heavy sets and tight tension. Go for a light halo or a few clip-ins placed away from fragile areas.
Care, maintenance, and safety: the cheat sheet
Use these quick rules to keep extensions fresh and your natural hair healthy.
Daily care
- Detangle from ends up with a soft-bristle or loop brush twice a day.
- Dry roots fully after workouts. Sweat left at the scalp weakens tapes and beads.
- Two-finger rule: you should slide two fingers between your scalp and any installed row without pain.
Washing
- Clip-ins/halo: wash only when product builds up (every 15-20 wears). Air-dry flat.
- Tape-in/micro-link/fusion/sew-in: wash 1-2x per week. Keep nails and pressure gentle at the attachment points.
- Products: use sulfate-free, low-residue shampoo; light, silicone-free conditioner from mid-lengths to ends. Avoid oils on tapes/bonds.
- After tape-in install: wait 48 hours before the first wash to let adhesive cure.
Heat and styling
- Keep hot tools below 350°F/177°C on human hair extensions to reduce dryness.
- No direct heat on keratin bonds, beads, or tapes. Use the “3-second rule”-if you need to think twice, don’t do it.
- Curl in alternating directions for a natural blend; add a final pass through both hair and extensions together.
Sleeping, gym, and travel
- Never sleep in clip-ins or a halo.
- For installed methods, sleep in a loose braid or low pony on a silk pillowcase to reduce friction.
- Swimming: wet hair first with tap water, add a light leave-in, and braid. Rinse immediately after; salt and chlorine dry out hair and can lift tapes.
Coloring
- Human hair extensions can be toned or dyed darker by a pro. Lightening often damages them-buy the right color instead.
- Synthetic hair melts under heat and doesn’t take dye. Treat as a different product with low heat or steam-only styling.
When to take a break
- Signs you need a pause: scalp soreness, tiny bumps along parts, shedding at temples, or wefts slipping repeatedly.
- Rotating off between installs (2-4 weeks) lets your scalp recover and reduces tension-related risk.

Mini-FAQ, troubleshooting, and your next moves
Mini-FAQ
- Will extensions ruin my hair? Not if they’re installed correctly, maintained well, and you respect tension. Problems mostly come from too much weight, poor installs, or skipping maintenance.
- How do I match color? Match the mid-lengths to ends of your hair, not the roots. If between shades, go slightly lighter and tone down rather than try to lighten extensions.
- Can I use extensions on fine or thin hair? Yes-choose lighter sets, focus on halo or a few clip-ins placed away from fragile areas, or ultra-thin tape-ins with an experienced stylist.
- How many grams do I need? Fine hair: 120-160 g; medium: 160-200 g; thick: 200-240 g for 18-22 inch lengths with clip-ins. For tape-ins, 20-40 sandwiches is typical depending on density and goals.
- Can I sleep with them? Only semi-permanent methods (tape, sew-in, micro-link, fusion) are sleep-safe. Clip-ins/halo come out nightly.
- Human vs. synthetic? Human hair blends, styles, and lasts longer. Synthetic is cheaper, pre-styled, and low-heat only. For heat styling and longevity, go human.
Troubleshooting
- Clips are showing: use fewer wefts, start lower at the nape, tease the base more, and leave extra hair near the part to cover.
- Halo is sliding: tighten the wire one notch, lower the placement 0.5 inch, and add more top hair to cover the wire.
- Tape-ins slipping: check for oils/silicones in your shampoo or dry shampoo. Clarify roots; avoid conditioner above mid-lengths; wait the full 48 hours after install before washing.
- Beads feel bumpy: bead size or section size may be off. Ask your stylist to re-section and re-clamp. You shouldn’t feel sharp pressure.
- Itchy scalp: switch to a gentle, fragrance-free shampoo and rinse thoroughly. If irritation persists or you see bumps, remove extensions and consult a dermatologist.
- Ends look dry: add a pea-size leave-in oil to ends only, air-dry more, and lower heat settings. Consider trimming the extensions for a blunt, healthier line.
Your next steps
- Decide your commitment level: daily on/off (clip-ins/halo) or weeks of wear (tape/micro-link/sew-in/fusion).
- Pick the weight and length: fine hair = lighter sets; choose a length within ~4 inches of your real hair for the easiest blend.
- Color-match in daylight: match your ends, not roots. If ordering online, request a color ring or send a daylight photo to the brand’s support.
- Test-drive at home: try clip-ins or a halo first. Time yourself; you should get from zero to styled in under 20 minutes after a couple tries.
- Book a consult for semi-permanent: bring photos of your hair down and in a ponytail. Ask about tension, maintenance schedule, and total cost including move-ups.
- Build a small care kit: loop brush, silk scrunchies, sulfate-free shampoo, lightweight leave-in, and for tape-ins a compatible remover for emergencies.
One last reality check: good extensions should feel like your hair, not a helmet. If you forget you’re wearing them, you did it right. If they pull or get in the way of life-workouts, sleep, headphones-switch the method. You’ve got options, and the best one is the one you don’t notice all day.