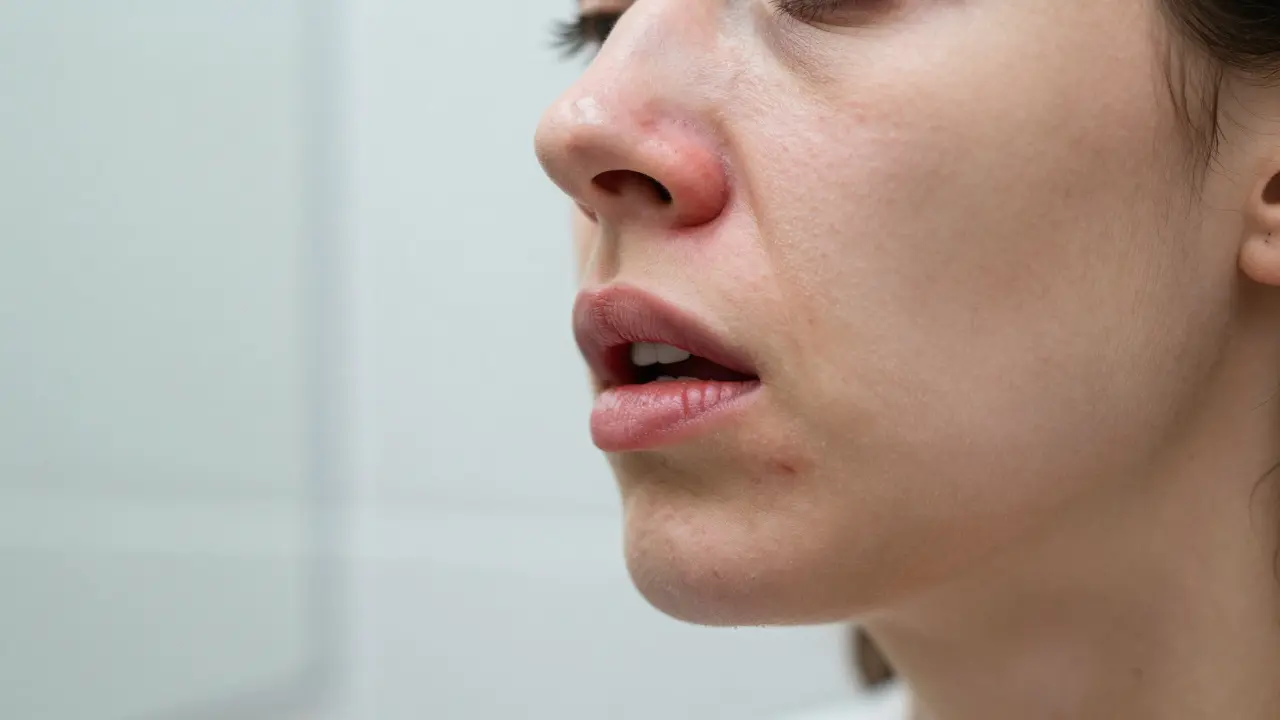
There is nothing quite as frustrating as walking out of the salon with perfectly smooth skin, only to realize your upper lip feels like it’s on fire. You catch a glimpse in the mirror and see angry redness where there should be clear, hair-free skin. It happens more often than you might think. Whether you did it yourself at home or trusted a professional, a wax burn can turn a beauty routine into a medical minor emergency.
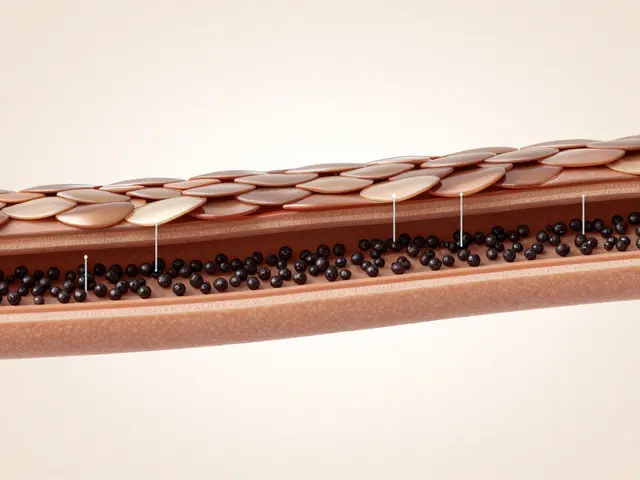
The skin on your upper lip is thin, sensitive, and packed with nerve endings. When hot wax hits this area, even for a second too long, it can cause thermal damage that looks and feels exactly like a sunburn or a mild scald. The good news? Most wax burns are superficial and heal quickly if you handle them right. The bad news? Picking at them, applying the wrong products, or ignoring them can lead to scarring or infection.
This guide will walk you through exactly what to do immediately after the incident, how to treat the burn over the next few days, and what to avoid while your skin recovers. We’ll also cover when you need to see a doctor and how to prevent this from happening again.
Immediate First Aid: What to Do in the First Hour
Your first instinct might be to run to the bathroom and splash cold water on your face. While cooling the area is crucial, you need to do it correctly to avoid shocking the tissue further. Here is the step-by-step protocol for the first hour after a wax burn.
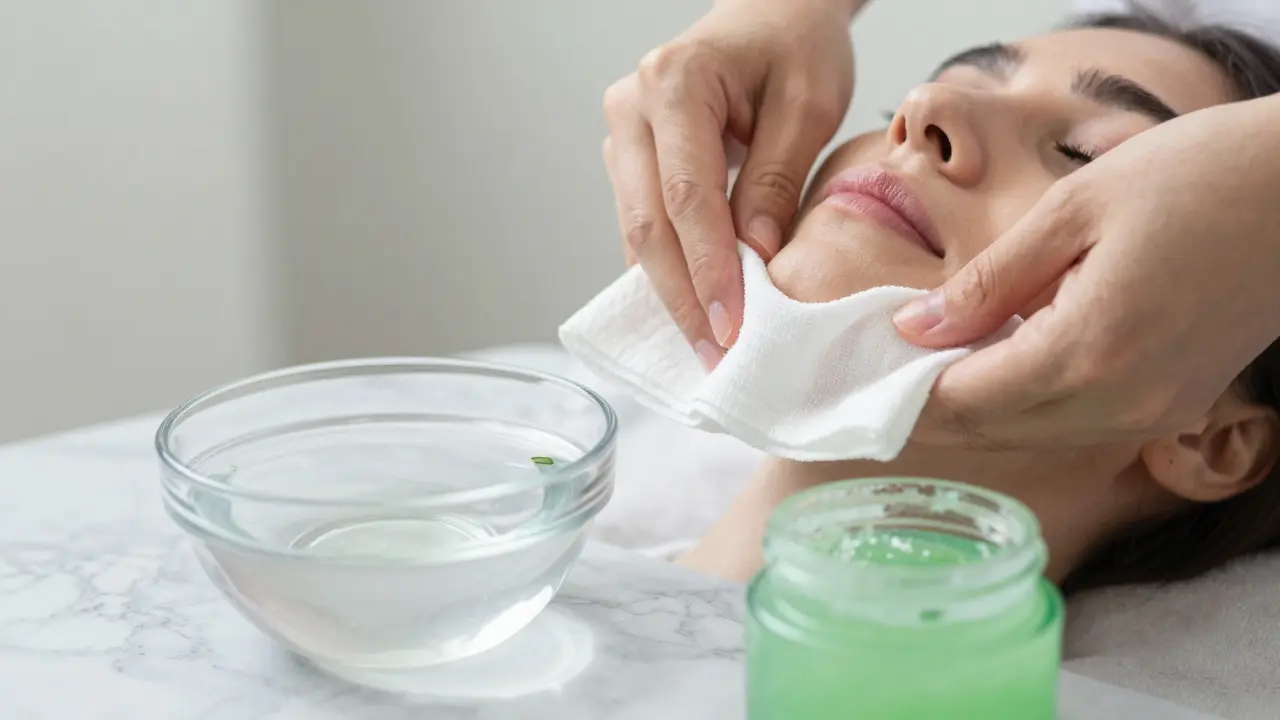
- Cool the Area Immediately: Use cool (not ice-cold) running water. Let it flow over the burned area for 10-15 minutes. If you can’t get to a sink, apply a clean cloth soaked in cool water. Change the cloth every few minutes to keep it cool. This stops the burning process and reduces pain.
- Avoid Ice Directly on Skin: Never put an ice cube directly on a wax burn. The extreme cold can damage the already compromised skin cells, leading to frostbite-like injury on top of the burn. Always use a barrier like a thin towel or gauze if you must use ice packs.
- Remove Residual Wax Carefully: If there is still wax stuck to your skin, do not peel it off aggressively. Apply a small amount of baby oil, coconut oil, or specialized wax remover to dissolve the remaining wax gently. Wipe it away with a soft cotton pad. Peeling dry wax can tear the damaged skin layer.
- Apply a Soothing Agent: Once the area is clean and cool, apply a thin layer of pure aloe vera gel. Aloe contains salicylic acid and polysaccharides that promote healing and reduce inflammation. Ensure the aloe is free from alcohol, fragrances, or green dyes, which can sting and irritate fresh burns.
Do not apply butter, toothpaste, or egg whites. These old wives’ tales trap heat in the skin and introduce bacteria, increasing the risk of infection. Stick to medical-grade or natural, simple ingredients.
Treating the Burn Over the Next Few Days
After the initial shock wears off, your focus shifts to protecting the skin and promoting regeneration. The skin on your upper lip is exposed to elements like sunlight, food, and facial movements, making it tricky to heal. Here is how to manage the recovery phase.
Moisturize Without Suffocating
Dry skin heals slower and is more prone to cracking. Keep the area moisturized, but choose the right product. Look for ointments containing petroleum jelly (Vaseline) or zinc oxide. These create a protective barrier that locks in moisture and keeps bacteria out. Apply a thin layer twice a day. Avoid heavy creams with retinoids, alpha hydroxy acids (AHAs), or beta hydroxy acids (BHAs), as these exfoliants will strip the new skin cells forming underneath.
Protect From the Sun
Freshly burned skin is hyper-sensitive to UV rays. Exposure to sunlight can darken the area, leading to post-inflammatory hyperpigmentation-a dark spot that can last for months. Even if you’re indoors near a window, wear a broad-spectrum sunscreen with SPF 30 or higher. Since applying sunscreen directly on an open wound can sting, wait until the skin has closed up (usually 24-48 hours). Until then, wear a wide-brimmed hat when going outside.
Keep It Clean
Infection is the biggest risk with any break in the skin. Wash your face gently with a mild, fragrance-free cleanser. Pat the area dry with a clean towel-do not rub. If the burn blisters, do not pop it. The blister roof acts as a natural bandage. If it pops on its own, clean the area with saline solution and apply an antibiotic ointment like bacitracin to prevent bacterial growth.
| Category | Recommended Products/Actions | Products/Actions to Avoid |
|---|---|---|
| Cooling Agents | Cool running water, aloe vera gel, chamomile tea bags | Ice cubes directly on skin, frozen packs without barrier |
| Moisturizers | Petroleum jelly, zinc oxide cream, plain coconut oil | Retinol creams, glycolic acid, fragranced lotions |
| Cleansers | Mild, soap-free facial cleansers, saline solution | Harsh soaps, scrubs, exfoliating brushes |
| Pain Relief | Oral ibuprofen or acetaminophen | Topical anesthetics with benzocaine (can cause allergic reactions) |
Understanding Wax Burn Severity
Not all wax burns are created equal. Knowing the severity helps you decide whether home care is enough or if you need professional medical attention. Burns are generally classified into three degrees.
- First-Degree Burn: This is the most common type from waxing. The skin is red, painful, and dry. There are no blisters. It usually heals within 3-6 days. Think of it like a mild sunburn.
- Second-Degree Burn: The skin is red, swollen, and painful. Blisters form. The surface may look wet or shiny. Healing takes 1-3 weeks. These require careful cleaning to prevent infection.
- Third-Degree Burn: Rare in home waxing but possible with extremely hot wax or prolonged contact. The skin may look white, charred, or leathery. Pain might be less intense because nerve endings are damaged. This requires immediate medical attention.
If your burn covers a large area, shows signs of infection (pus, increased redness, fever), or doesn’t improve after a week, see a doctor. Don’t wait.
Preventing Future Wax Burns
Once your skin has healed, you probably want to go back to waxing. It’s effective and convenient. But you need to change your technique to avoid repeating the mistake. Prevention is always better than cure.
Test the Temperature
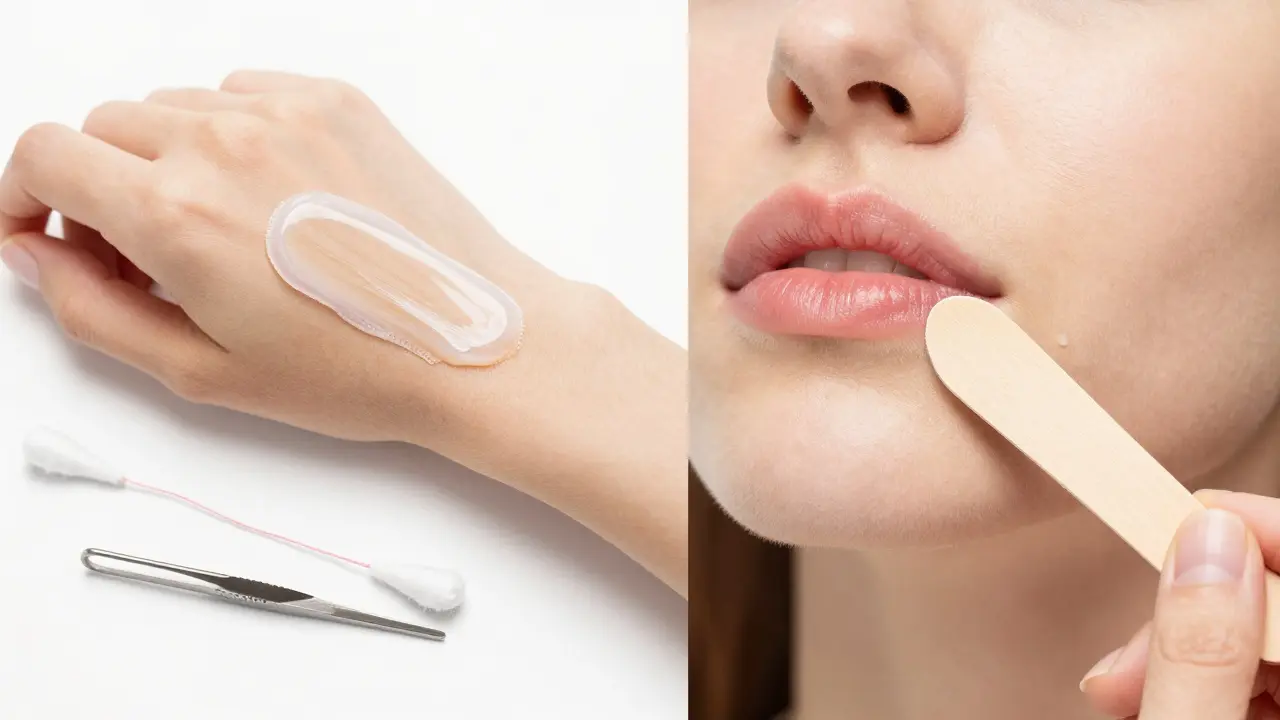
Before applying wax to your face, test it on the inside of your wrist. The wax should feel warm, not hot. If it stings your wrist, it’s too hot for your upper lip. Professional wax heaters have temperature controls; set them according to the manufacturer’s instructions. For hard wax, let it cool slightly after heating. For soft wax, ensure it’s spreadable but not liquid-hot.
Use the Right Wax Type
Hard wax is generally safer for sensitive areas like the upper lip and eyebrows. It adheres to the hair, not the skin, and doesn’t require strips. Soft wax sticks to both hair and skin, requiring a strip to remove, which increases the risk of tearing and irritation if applied too thickly or too hotly. If you have sensitive skin, switch to hard wax or consider alternative hair removal methods like threading or tweezing.
Prepare the Skin
Cleanse your skin before waxing to remove oils and makeup. Exfoliate gently 24 hours before waxing to remove dead skin cells, which can help the wax grip the hair better. However, do not exfoliate immediately before or after waxing, as this can irritate the skin. Apply a pre-wax oil or powder to create a barrier between the wax and your skin. This reduces direct contact and minimizes the chance of burns.
Limit Exposure Time
Apply wax in thin layers. Thick layers take longer to cool and can retain heat against the skin. Remove the wax quickly and confidently. Hesitation can lead to reapplying wax, which increases heat exposure. If you’re unsure, practice on a less sensitive area first.
Alternative Hair Removal Methods
If waxing continues to cause issues, it might be time to explore other options. Each method has pros and cons regarding pain, cost, and effectiveness.
- Threading: Uses twisted cotton thread to pull out hair. No heat involved, so no risk of burns. Great for precision around the upper lip. Can be painful but less irritating to the skin.
- Tweezing: Manual removal with tweezers. Best for stray hairs. Time-consuming but gives you full control. Low risk of burns, but can cause ingrown hairs if done incorrectly.
- Depilatory Creams: Chemical creams that dissolve hair. No heat, but high risk of chemical burns if left on too long or used on sensitive skin. Always patch test first.
- Laser Hair Removal: Long-term solution using light energy to destroy hair follicles. Requires multiple sessions. Can cause temporary redness or swelling, but rare to cause actual burns if performed by a certified professional.
Consider your pain tolerance, budget, and skin sensitivity when choosing an alternative. For many people with sensitive upper lip skin, threading becomes the go-to method due to its precision and lack of heat.
When to See a Doctor
While most wax burns heal at home, some situations require professional care. Seek medical advice if:
- The burn is larger than 2 inches in diameter.
- You see pus, yellow discharge, or increasing redness spreading from the burn site.
- You develop a fever or chills.
- The pain is severe and not relieved by over-the-counter painkillers.
- The burn is on your eye, mouth, or genitals.
- There is no improvement after 7-10 days.
A healthcare provider can prescribe stronger antibiotics, specialized dressings, or pain management strategies. They can also assess for deeper tissue damage that isn’t visible on the surface.
How long does a wax burn on the upper lip take to heal?
A first-degree wax burn typically heals within 3 to 6 days. Second-degree burns with blisters can take 1 to 3 weeks to fully recover. Proper care, including keeping the area clean and moisturized, speeds up healing. Avoid picking at scabs, as this can delay healing and cause scarring.
Can I put Vaseline on a wax burn?
Yes, petroleum jelly (Vaseline) is excellent for wax burns. It creates a protective barrier that keeps moisture in and bacteria out. Apply a thin layer once the burn has cooled down completely. Do not apply it immediately while the skin is still hot, as this traps heat.
Is aloe vera safe for wax burns?
Pure aloe vera gel is very soothing and promotes healing. Make sure to use 100% pure aloe without added alcohol, fragrances, or colors. These additives can irritate the burned skin. Apply a thin layer after cooling the burn with water.
Why did my upper lip burn during waxing?
The skin on the upper lip is thinner and more sensitive than other parts of the body. Burns often occur because the wax was too hot, applied too thickly, or left on the skin for too long. Using hard wax instead of soft wax can also reduce the risk since it adheres less to the skin.
Should I pop blisters from a wax burn?
No, never pop blisters intentionally. The fluid inside protects the new skin forming underneath. Popping them increases the risk of infection. If a blister bursts on its own, clean the area gently with saline and apply an antibiotic ointment.
Can I use hydrocortisone cream on a wax burn?
Hydrocortisone cream can reduce itching and inflammation, but it should be used sparingly and only after the initial acute phase (first 24-48 hours). Consult a pharmacist or doctor before using steroid creams on facial burns, as they can thin the skin if used excessively.
How do I prevent hyperpigmentation after a wax burn?
Protect the healing skin from sun exposure. Use a broad-spectrum SPF 30+ sunscreen daily once the skin has closed. Avoid picking at scabs. Vitamin C serums can help fade dark spots later, but only after the skin has fully healed.